Documentation
Learn how to use AMENBREAK VST
LET'S GO! Mode
The simplified interface with two main controls for quick breakbeat manipulation.
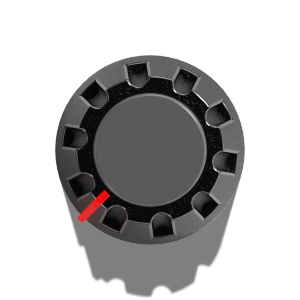
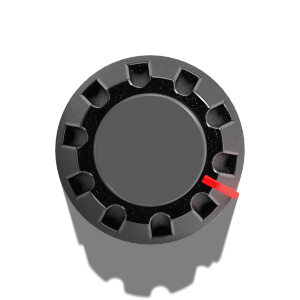
Break Settings
Use the SETTINGS panel to choose which break effects the Break knob can activate.
ALLOW REVERSE
Enables or disables the reverse playback effect during breaks.
ALLOW STUTTER
Enables or disables the stutter (short, repeated segments) effect during breaks.
ALLOW TIMESTRETCH
Enables or disables the time-stretching effect, altering playback speed without changing pitch, during breaks.
ALLOW TAPESTOP
Enables or disables the tape-stop effect, simulating a record player slowing down and speeding up, during breaks.
ALLOW JUMP
Enables or disables the jump effect, which causes the playhead to skip to a different part of the sample, during breaks.
ALLOW REROLL
Enables or disables the reroll effect, which re-randomizes the slice order, during breaks.
ALLOW BRAINDANCE
Enables or disables the braindance effect (a complex, multi-effect randomization) during breaks.
ALLOW DECIMATION
Enables or disables the decimation (bit-crushing/sample rate reduction) effect during breaks.
ALLOW TUNNEL
Enables or disables the tunnel effect, which creates a momentary, usually delayed, loop or transition, during breaks.
CAREFUL! Mode
The advanced interface with granular control over five individual break effects.
Installation Instructions
To install the AmenBreak VST3 plug-in, copy the contents of the VST3 package into your system's standard VST3 directory so hosts can discover it automatically.
- macOS: Move
amenbreak.vst3into/Library/Audio/Plug-Ins/VST3/(system-wide) or~/Library/Audio/Plug-Ins/VST3/(per-user). If the VST3 does not show up in your DAW after rescanning, restart your computer. - Linux: Place
amenbreak.vst3inside~/.vst3/for personal installs or/usr/lib/vst3/for a system-wide location. - Windows: Copy
amenbreak.vst3toC:\Program Files\Common Files\VST3\(64-bit hosts) or%USERPROFILE%\Documents\VST3\if you prefer a user-specific directory.
After copying, refresh your DAW's plug-in scan or restart the host so it can pick up the newly installed plug-in.
macOS (Logic Pro)
- Remove any existing
.zipor.aufiles from your Downloads folder. THIS IS IMPORTANT. - Download the macOS AU.
- Unzip it.
- You should now have
AMENBREAK.component. Copy it. - Paste it into
/Library/Audio/Plug-Ins/Components. - Open Logic.
- In Logic, go to Settings → Plugin Manager and confirm AMENBREAK appears.
- Load an instrument track.
- Set the instrument to AU Instruments → AMENBREAK.
- That's it!
macOS (Ableton Live)
- Remove any existing
.zipor.vst3files from your Downloads folder. THIS IS IMPORTANT. - Download the macOS VST3.
- Unzip it.
- Copy
AMENBREAK.vst3. - Open Finder → click Go → Go to Folder... and enter
~/Library/Audio/Plug-Ins/VST3/. - Paste
AMENBREAK.vst3there. - Open Ableton and open Preferences → Plug-Ins and make sure to enable Use VST3 Plug-In System Folders.
- Rescan plugins if needed.
- Load a MIDI track, then select Plugins → AMENBREAK as the instrument.
- That's it!
Uninstalling
To completely remove AMENBREAK VST from your system, delete both the VST3 plugin file and the user settings directory.
macOS
- Delete the plugin file:
~/Library/Audio/Plug-Ins/VST3/amenbreak.vst3(per-user), or
/Library/Audio/Plug-Ins/VST3/amenbreak.vst3(system-wide) - Delete the settings directory:
~/Library/Application Support/AMENBREAK/
This folder contains your presets, slice data, MIDI CC mappings, and license information. - Rescan plugins in your DAW to remove AMENBREAK VST from the list.
Linux
- Delete the plugin file:
~/.vst3/amenbreak.vst3(per-user), or
/usr/lib/vst3/amenbreak.vst3(system-wide) - Delete the settings directory:
~/.config/AMENBREAK/
This folder contains your presets, slice data, MIDI CC mappings, and license information. - Rescan plugins in your DAW to remove AMENBREAK VST from the list.
Windows
- Delete the plugin file:
C:\Program Files\Common Files\VST3\amenbreak.vst3(system-wide), or
%USERPROFILE%\Documents\VST3\amenbreak.vst3(per-user) - Delete the settings directory:
%APPDATA%\AMENBREAK\
This folder contains your presets, slice data, MIDI CC mappings, and license information.
To access this folder quickly, pressWin+R, type%APPDATA%, and press Enter. - Rescan plugins in your DAW to remove AMENBREAK VST from the list.
Note: If you want to keep your presets and settings for future use, only delete the plugin file. The settings directory can be left in place and will be reused if you reinstall AMENBREAK VST later.
Video Tutorial
Watch our comprehensive video tutorial to get started with AMENBREAK VST and learn how to make the most of its powerful features:
Manipulating Slices
Slice markers can be edited directly on the waveform, or generated automatically for fast setup.
Manual edits
- Drag a marker to adjust its position.
- Double-click a marker to delete it.
- Secondary-click an empty spot on the waveform to add a new marker.
Play slices
- Click a slice region to start playback from that slice.
- Click the same slice again to stop (toggle behavior).
Waveform controls
- Zoom in and out with the mouse wheel.
- Click and hold the middle mouse button to drag (pan) the waveform.
Automatic slicing
AUTO runs onset detection and places markers at transients, using the method selected in Settings. Methods include amplitude-based Energy, brightness-focused HFC, phase-driven Complex/Phase/WPhase, spectral-change methods like Specdiff/Specflux, KL/MKL divergence, and a Consensus mode that combines multiple detectors. EVEN splits the sample into equal parts based on the slice count.
SLICES ARE PERFORMABLE
Creating and changing slices is part of the performance — and both automatic slicing and slice count can be mapped to MIDI CCs for hands-on control.
Keyboard Controls
AMENBREAK VST supports keyboard shortcuts for quick control during performance. Click on the plugin window to ensure it has focus, then use these keys:
Transport & Navigation
Spacebar— Toggle Start/Stop (sequencer playback)Left Arrow— Load previous file in folderRight Arrow— Load next file in folder
Effect Toggles
1— Toggle Reverse2— Toggle Stretch (timestretch)3— Toggle Stutter4— Toggle Tape-stop5— Toggle Pitch Preserve6— Toggle Tunnel (requires license)
Slice Triggering
AthroughZ— Trigger slices (letter maps to slice index modulo number of slices)
For example, with 8 slices: A=slice 1, B=slice 2, ... H=slice 8, I=slice 1 (wraps around).
Note: Unlike mouse clicks which toggle slices on/off, keyboard presses always retrigger the slice with a smooth crossfade — pressing the same key twice restarts that slice from the beginning.
MIDI Control
You can map MIDI Control Change (CC) messages to the following controls via Settings > MIDI CC MAPPINGS. Click LISTEN and then move the hardware knob or button to teach AmenBreak the CC number you want to bind, or type it in manually. MIDI note-on events always trigger slices directly—even when no CC is assigned.
Knobs & Sliders
- AMEN knob: Controls the slice rearrangement pattern.
- BREAK knob: Controls the probability of random break effects.
- Mode ComboBox: Selects the playback mode (e.g., Loop, PingPong).
- RATE dial: Controls the playback speed multiplier.
- STRETCH dial: Controls the intensity of the time-stretch effect.
- STRETCH RATE dial: Controls the frequency of the time-stretch modulation.
- STUTTER dial: Controls the number of stutter repetitions.
- STUTTER RATE dial: Controls the frequency of stutter repetitions per beat.
- ON TIME dial: Controls the tape-stop slow-down duration.
- OFF TIME dial: Controls the tape-stop speed-up/recovery duration.
- XFADE dial: Controls the crossfade duration between slices.
- STUTTER VOL START (dB): Sets the starting volume for the stutter effect.
- STUTTER VOL END (dB): Sets the ending volume for the stutter effect.
- STUTTER PITCH START (st): Sets the starting pitch shift for the stutter effect.
- STUTTER PITCH END (st): Sets the ending pitch shift for the stutter effect.
- STUTTER X-FADE (ms): Sets the crossfade duration for stutter segments.
- STUTTER BRAINDANCE (%): Controls the amount of randomization applied to stutter parameters.
- TIMESTRETCH BRAINDANCE (%): Controls the amount of randomization applied to time-stretch parameters.
- VOLUME (dB): Controls the master output volume.
- TUNNEL DURATION: Controls the duration of the tunnel effect.
- TUNNEL DISTANCE: Controls the jump distance for the tunnel effect.
Buttons & Toggles
- START/STOP: Toggles playback/sequencer.
- AUTO button: Triggers automatic transient detection.
- EVEN button: Triggers even slicing of the sample.
- PITCH PRESERVE: Toggles pitch-preservation (timestretching) mode.
- REVERSE!: Toggles the reverse effect.
- STRETCH!: Toggles the time-stretch effect.
- STUTTER!: Toggles the stutter effect.
- TAPESTOP!: Toggles the tape-stop effect.
- TUNNEL!: Toggles the tunnel effect.
MIDI Drag-out
Want to drive AMENBREAK from your DAW's piano roll? Click the keyboard key icon in the plugin, then drag and drop the current sequence straight into your DAW. That MIDI clip mirrors the slices/pattern you hear in AMENBREAK and can be edited or looped like any other MIDI region.
After dropping the clip, route it back to AMENBREAK VST to sequence the plugin. Make sure DAW TRANSPORT is set to MIDI ONLY in Settings so the plugin follows your DAW's MIDI notes without duplicating its internal transport.
Loading Files
AMENBREAK VST supports a variety of audio file formats including WAV, MP3, AIFF, FLAC, and OGG. Simply click the LOAD button or drag and drop files onto the waveform area.
Supported Formats with Slice Markers
In addition to standard audio files, AMENBREAK VST can automatically import slice marker positions from these specialized formats:
OP-1 Drum Patches
Files created for the Teenage Engineering OP-1 synthesizer store slice positions directly in their AIFF metadata. When you load an OP-1 drum patch (.aif), AMENBREAK VST automatically reads these embedded markers and sets up your slices accordingly. You can find thousands of community-created OP-1 drum patches at op1.fun, a community platform for sharing OP-1 patches with a browser-based drum patch builder.
Renoise Instruments
Renoise is a powerful digital audio workstation based on the classic tracker paradigm. Its instrument format (XRNI) supports non-destructive slice markers that divide samples into triggerable segments. When you load a Renoise instrument file (.xrni), AMENBREAK VST extracts the slice marker positions and applies them to the waveform, letting you immediately play sliced breakbeats and drum loops created in Renoise.
Standard Audio Files
For regular audio files without embedded slice data, use the AUTO button to automatically detect transients, or EVEN to divide the sample into equal parts. You can also click on the waveform to manually add slice markers, and drag existing markers to adjust their positions.
License Activation
When you launch AMENBREAK VST for the first time, the plugin prompts for a license key. Follow these steps to activate:
- Install the VST3 as described above and open it in your host.
- On the activation screen, paste the license key you received after purchase.
- Click Activate. The plugin contacts the license server over HTTPS to validate the key.
- Once validated, the key is stored locally and the plugin is ready to use.
If you encounter problems, copy the error message and reach out to zack@infinitedigits.co.
Troubleshooting
Bitwig
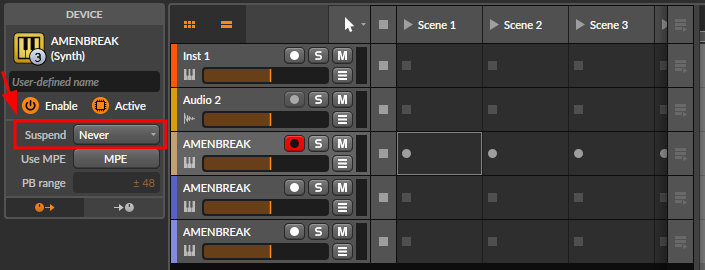
In Bitwig, double click the track header and change Suspend to Never. This keeps the AMENBREAK VST active and allows it to run more efficiently.
Support
If you need help with AMENBREAK VST, please contact us at zack@infinitedigits.co.
Join the Discord
Connect with other AMENBREAK VST users, share your creations, get tips, and stay updated on new features. Join our community on Discord: